Secondly, have I mentioned yet how much I love love love these LEAF videos? The ladies behind them are just genius. And their latest video is a home run for someone (like me) who can't exactly renovate their entire kitchen.
Showing posts with label decor. Show all posts
Showing posts with label decor. Show all posts
Tuesday, April 2, 2013
DIY Home Inspiration: 6 Easy Ways To Update Your Kitchen
First off, here's where I should be announcing who gets a $10 gift certificate from me for winning my riddle challenge. However, no one's even attempted soooooo here's a hint: 26.
Secondly, have I mentioned yet how much I love love love these LEAF videos? The ladies behind them are just genius. And their latest video is a home run for someone (like me) who can't exactly renovate their entire kitchen.
Secondly, have I mentioned yet how much I love love love these LEAF videos? The ladies behind them are just genius. And their latest video is a home run for someone (like me) who can't exactly renovate their entire kitchen.
Wednesday, March 20, 2013
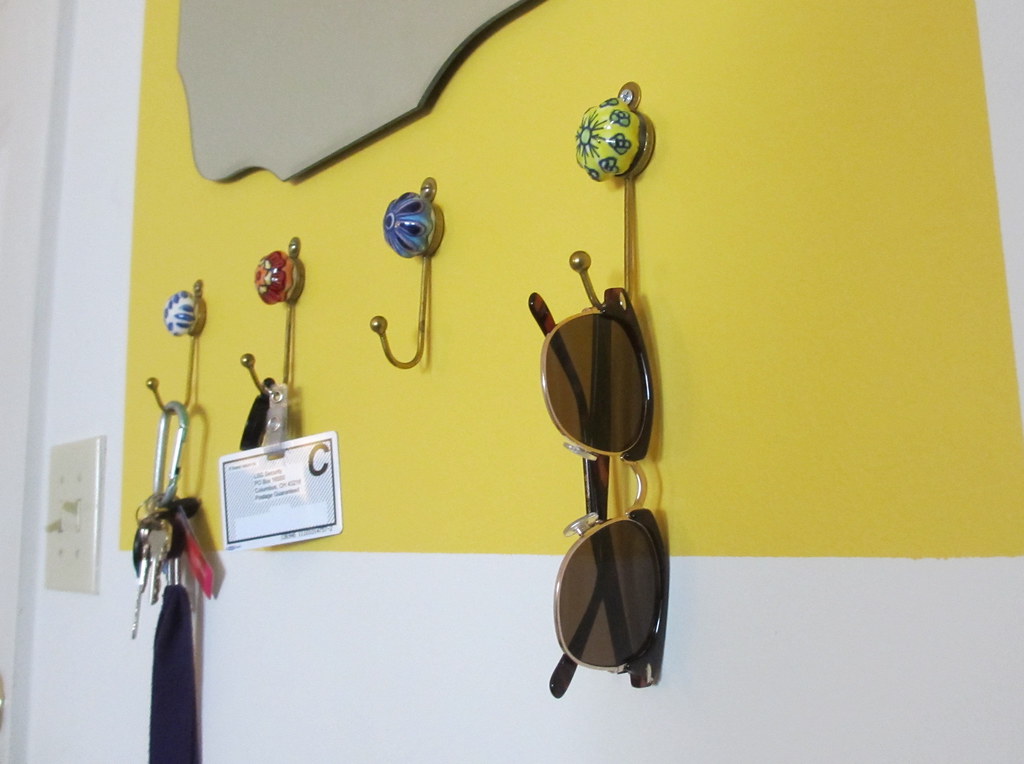
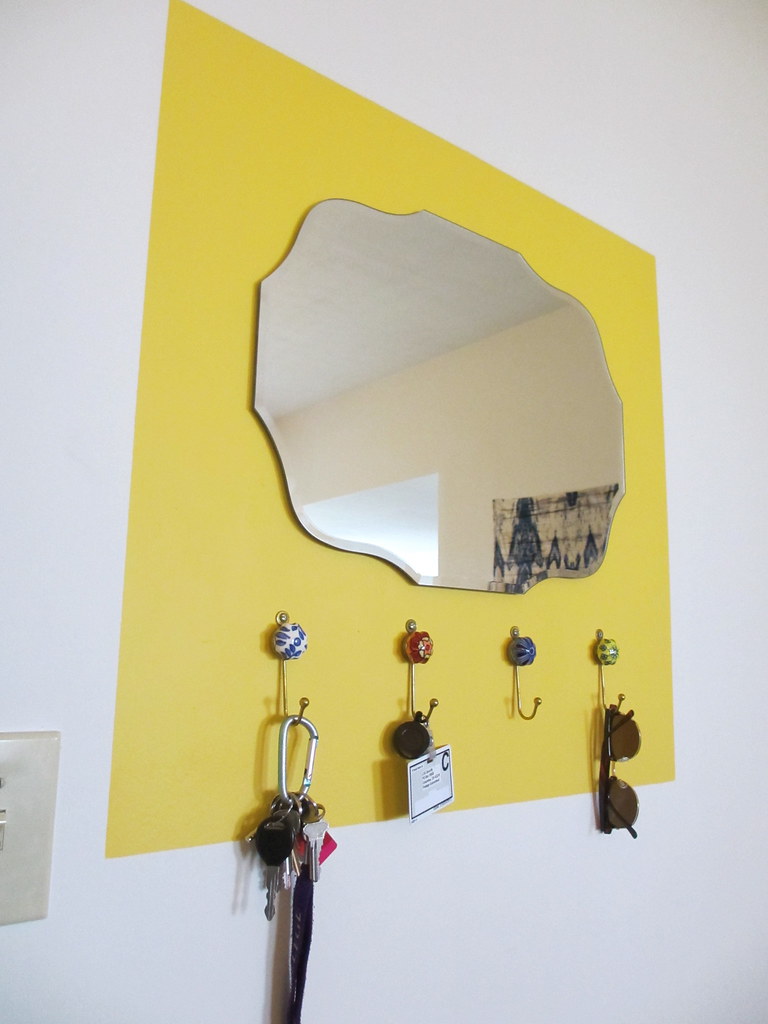
DIY Home: Colorblock Framed Mirror
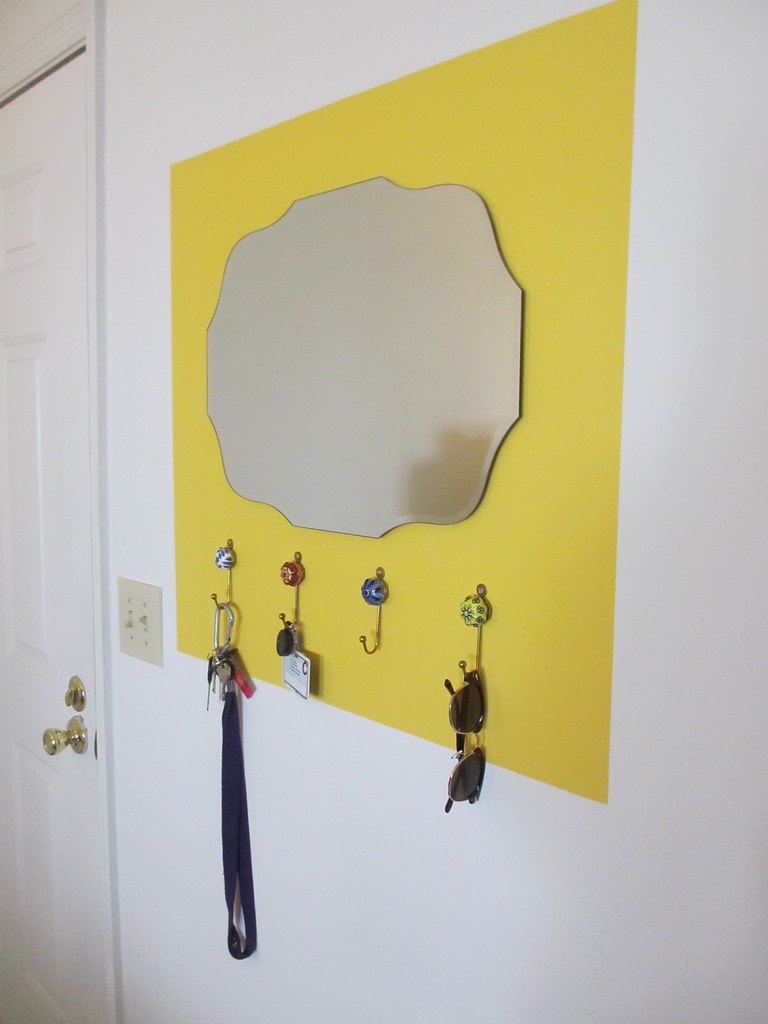
One, happy Spring!!
Two, know what one of the best things about having your own place is? Being able to paint a square of wall this pretty bright yellow, and no one can say anything about it!

What you need:
A mirror
Painter's tape
Bright paint (those 8oz paint samples are perfect for this)
Paintbrush
Drop cloth (newspapers works just fine)
Screwdriver/screws
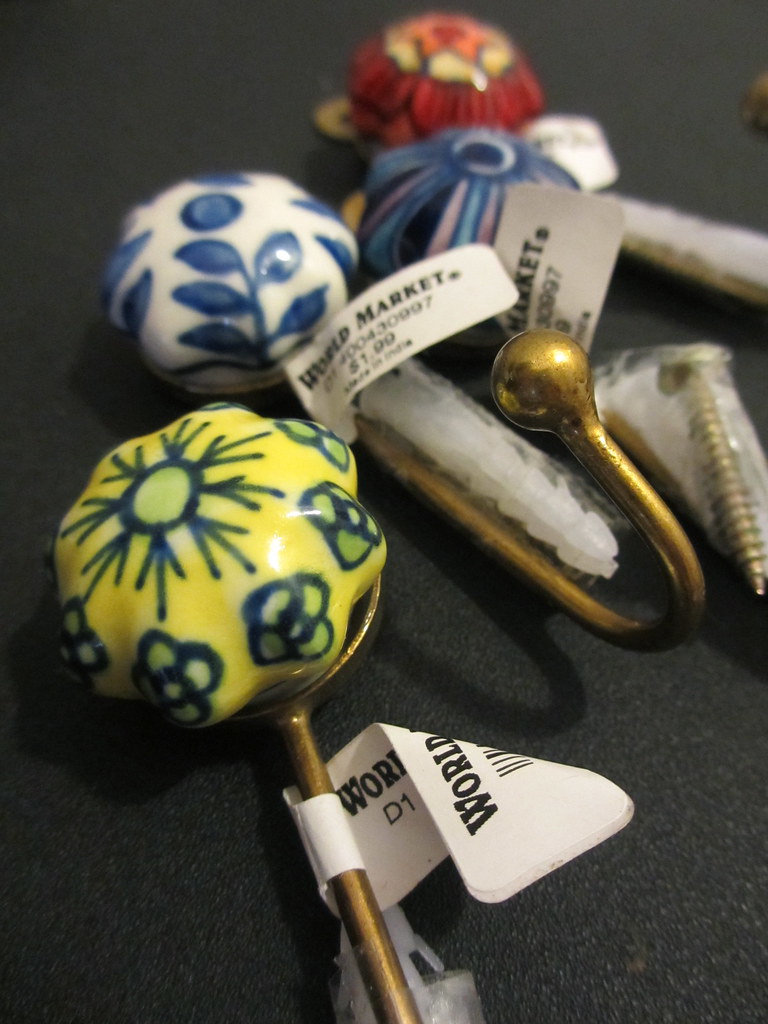
Hooks or drawer knobs (I got mine at World Market)

What you do:
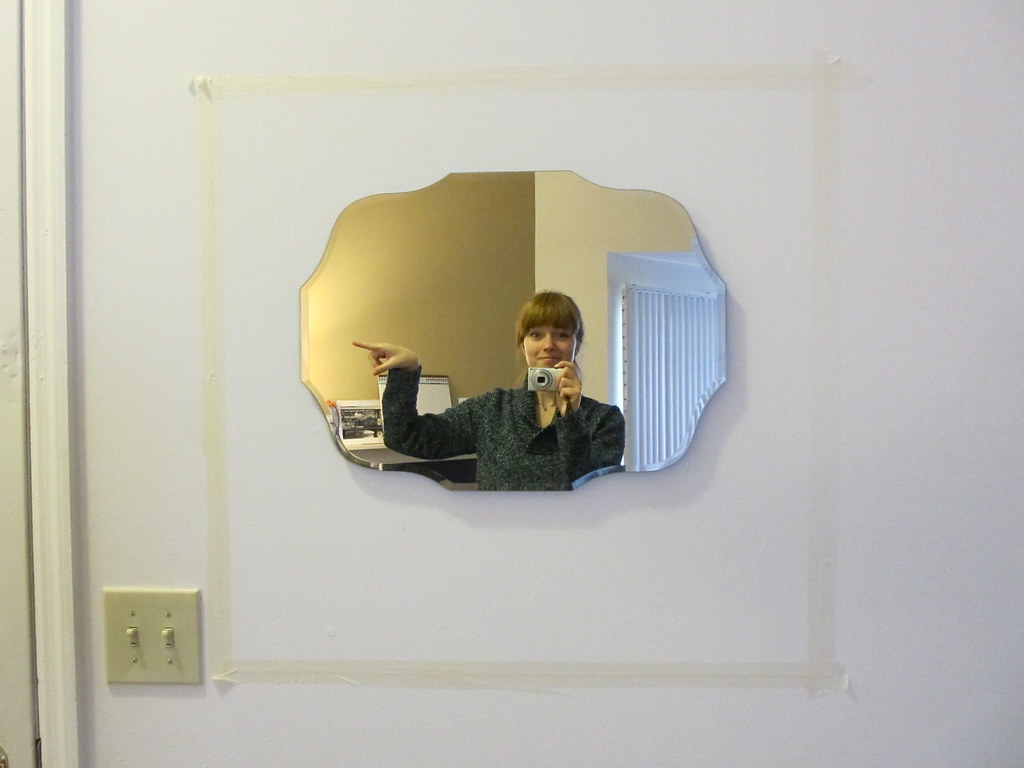
1) Start off with an area that is in desperate need of color. Even a pretty mirror doesn't make this area less boring...

2) Hang your mirror and tape off an area around it, making sure you're leaving extra room at the bottom for hooks and that you're square (though a circle or triangle frame could also be super cool!). Sorry for the dumb face and masking tape. I was really excited, and it was all I had...

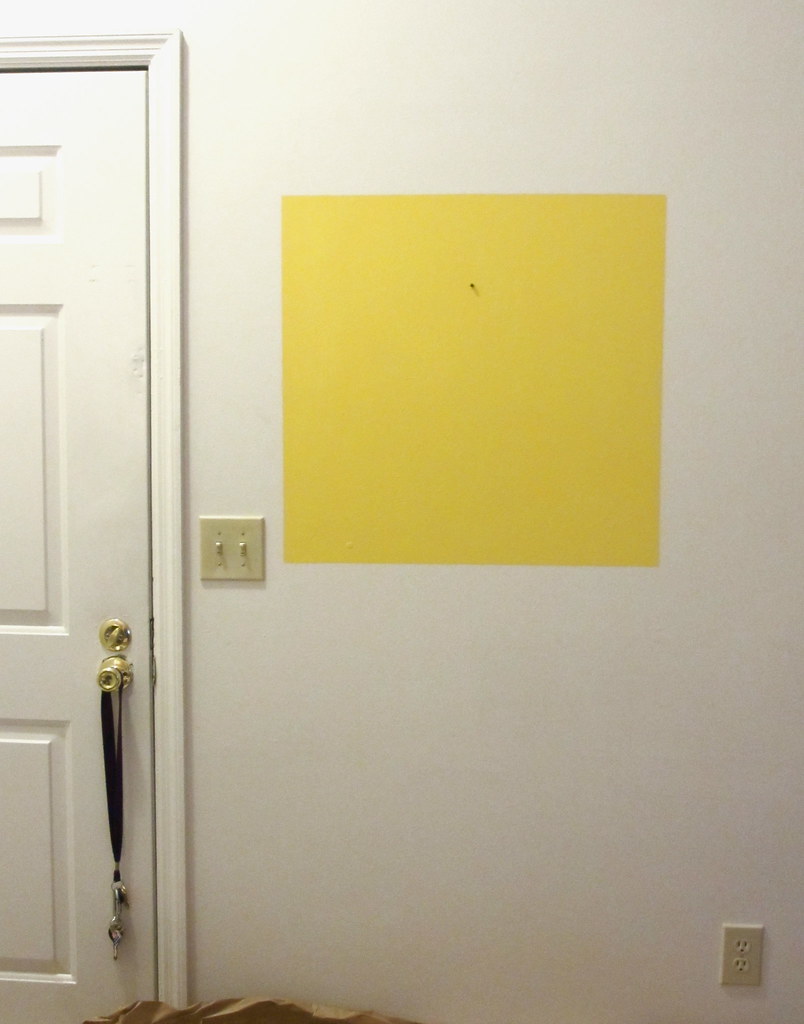
3) Take down your mirror (but leave in the screw!) and carefully paint in that box. My paint said to do at least two coats, waiting an hour or two between. I kind of liked the post modernism of just a huge yellow square on my wall...

4) Hang your mirror back up. Mark where you want your hooks to go, and screw them in.

5) Done! Seriously brightens up this dark corner in my apartment.


I kind of think it needs something else though. I'm tempted to paint the border of the mirror in another bright color, or add a chalk paint trim... what do you think??
Two, know what one of the best things about having your own place is? Being able to paint a square of wall this pretty bright yellow, and no one can say anything about it!
What you need:
A mirror
Painter's tape
Bright paint (those 8oz paint samples are perfect for this)
Paintbrush
Drop cloth (newspapers works just fine)
Screwdriver/screws
Hooks or drawer knobs (I got mine at World Market)
What you do:
1) Start off with an area that is in desperate need of color. Even a pretty mirror doesn't make this area less boring...

2) Hang your mirror and tape off an area around it, making sure you're leaving extra room at the bottom for hooks and that you're square (though a circle or triangle frame could also be super cool!). Sorry for the dumb face and masking tape. I was really excited, and it was all I had...
Oh, and ever wonder what camera I use? No? Well, this little point-and-shoot is it.
5) Done! Seriously brightens up this dark corner in my apartment.

I kind of think it needs something else though. I'm tempted to paint the border of the mirror in another bright color, or add a chalk paint trim... what do you think??
Thursday, March 7, 2013
DIY: Cork Flower Pot Dish
Let's talk plants. I put up this beautiful glass shelf a couple weeks ago in my dining nook to hold all my plants, but hated the thought of hiding it under a bunch of ugly flower pots and dishes. Enter my solution!


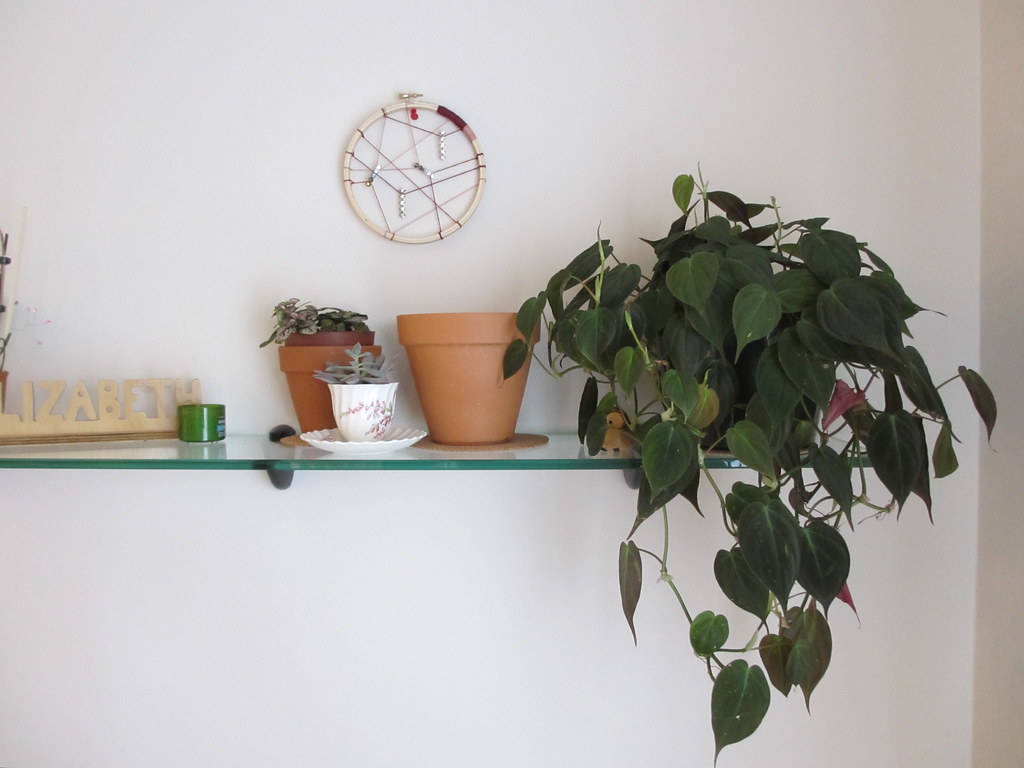
Cork! It fits with my neutral/white/pops of color thing I've got going on in my kitchen and living area, and is low-profile enough to not take away from all my pretty plants! The cork naturally absorbs water that might leak out from the soil, saving your shelf. However, I definitely recommend watering your plants in the sink and letting them drain there for a few minutes.
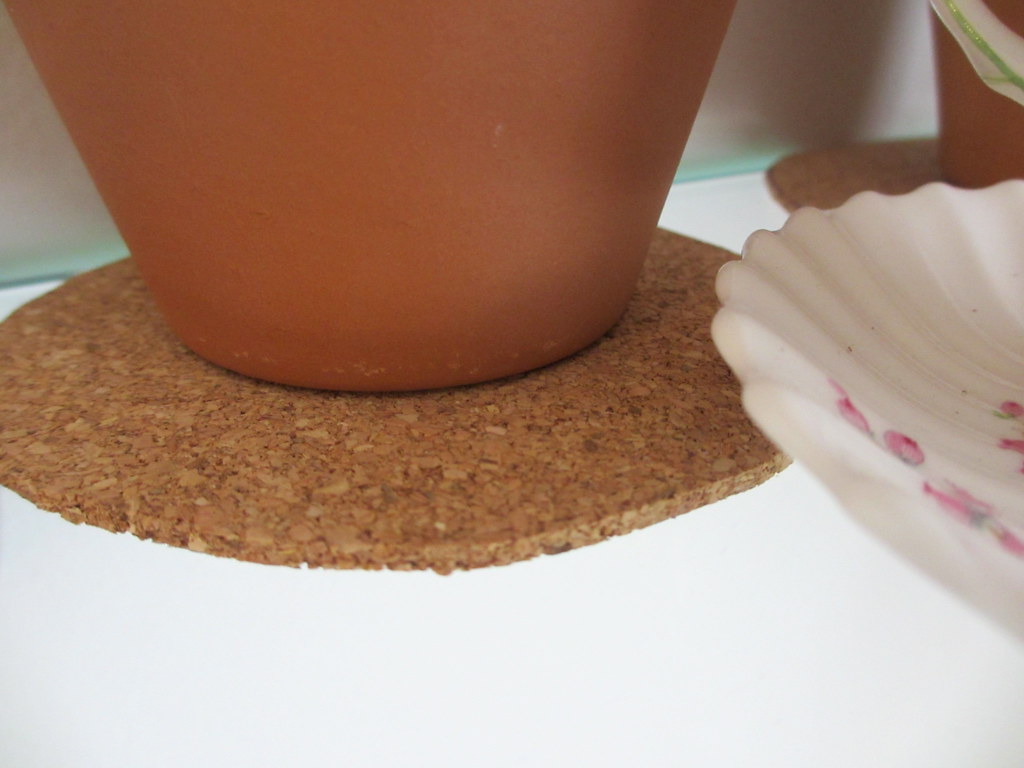
I took a roll of cork (you can get it at pretty much any crafts store), traced and cut out circles, and that was it! I made a few sizes, so you can see some...
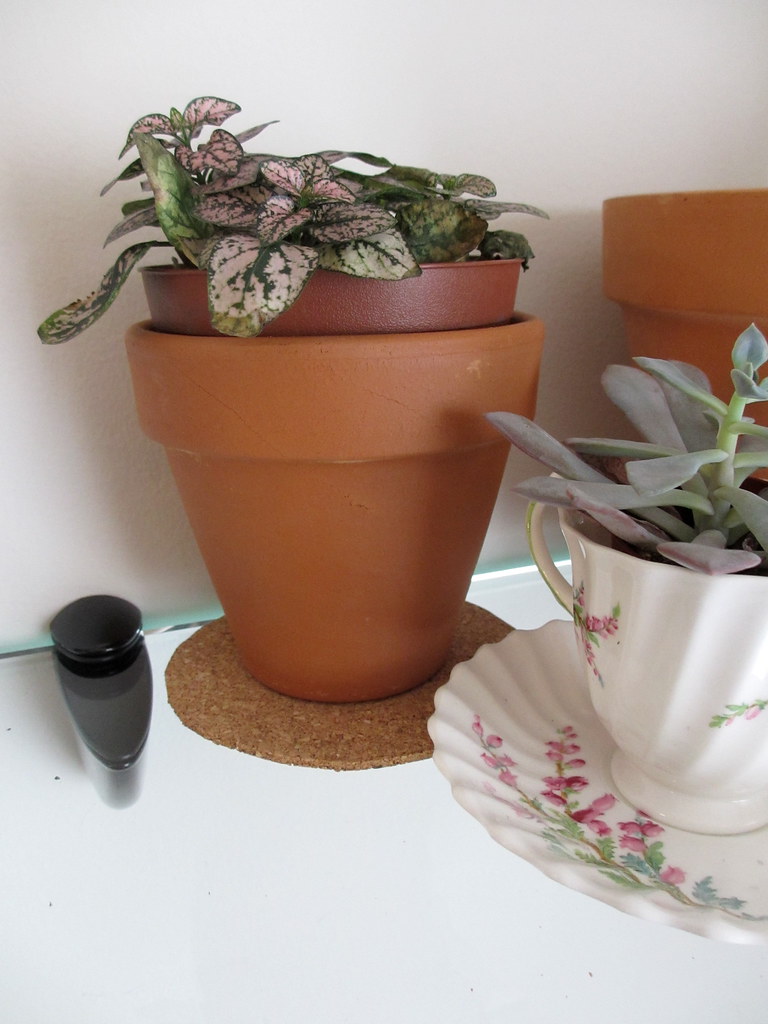
...and others are pretty hidden! I couldn't help but hide this little adorable little owl along with it..

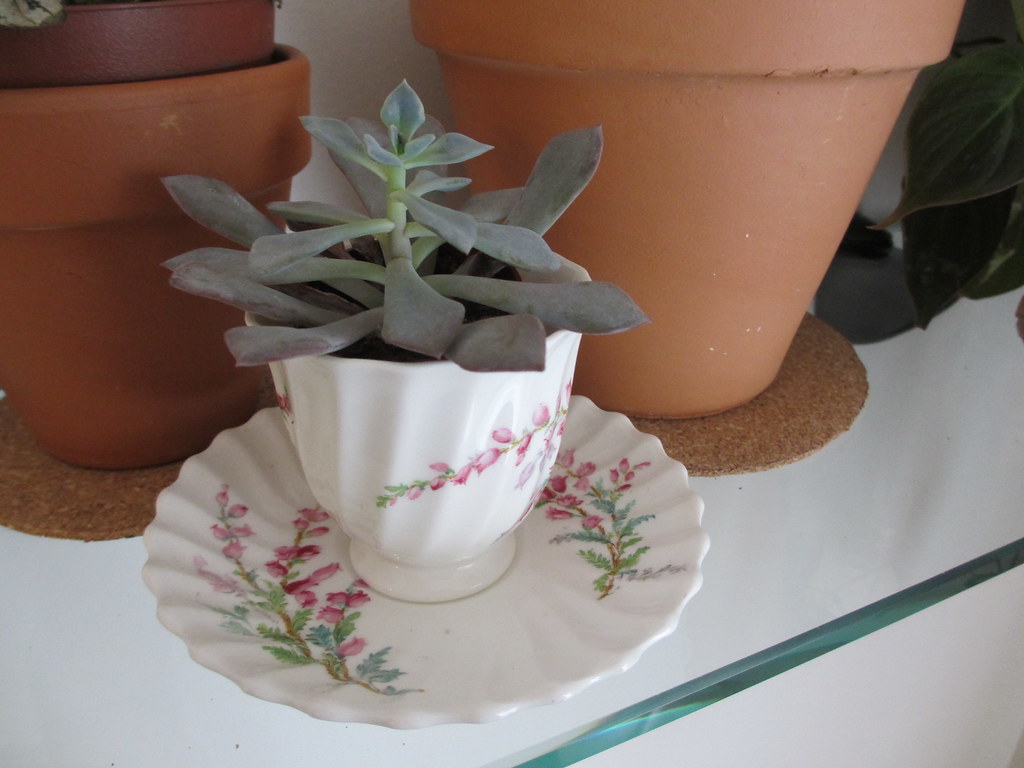
Another good flowerpot dish? A teacup and saucer! I just plopped this little guy and his pot inside this teacup and that's it!
Friday, February 22, 2013
DIY Home: Fireplace Mantle Shelf
Have I mentioned yet that I love my new apartment and its fireplace? I didn't, however, love the fact that there wasn't a mantle shelf above it. Girl's gotta have a place to put all her fancy art (well, once I get some...)!


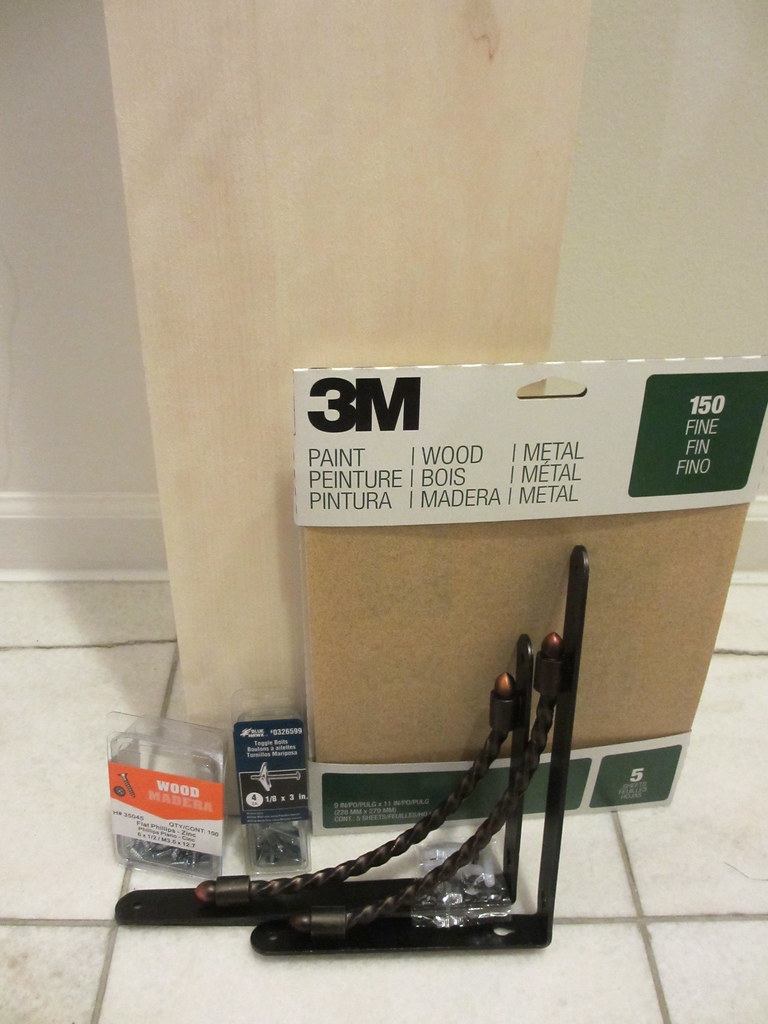
What you need:
Wood board
Shelf brackets
Screws
Studfinder (if no studs, get screws specifically for drywall installation)
Sandpaper
Stain and/or varnish

What you do:
1) Measure your fireplace width, then add a few inches on either side. I only added 5, so that it would end right over the brackets on either end, and not extend beyond the edges.
2) Determine how deep you want your shelf to be. Keep in mind that if your fireplace is relatively small like mine, you don't want a huge shelf to totally overwhelm it.
3) Pick out the type of wood you want, and get it cut down to size (yay Home Depot!). I chose Aspen since I liked how light it was and I knew I wouldn't be applying a stain.
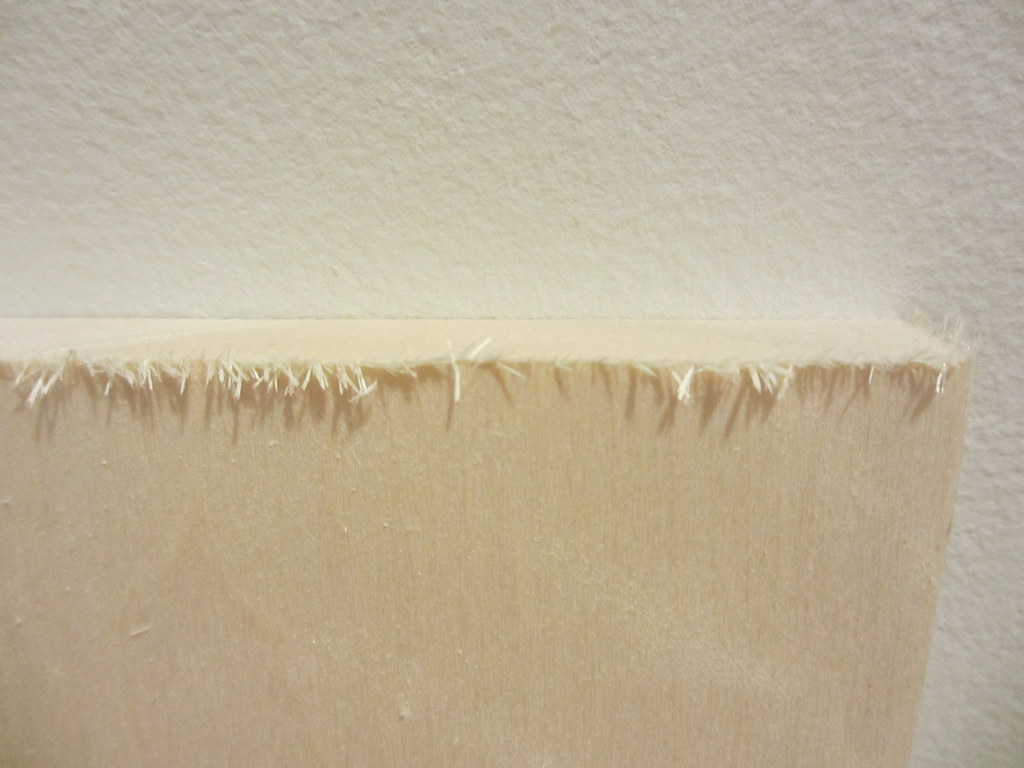
4) Since most freshly cut pieces of wood look something like this...

...lightly sand your new shelf. Stain and varnish if desired (I didn't since it's so darn cold outside and you DO NOT want to have all those fumes inside).

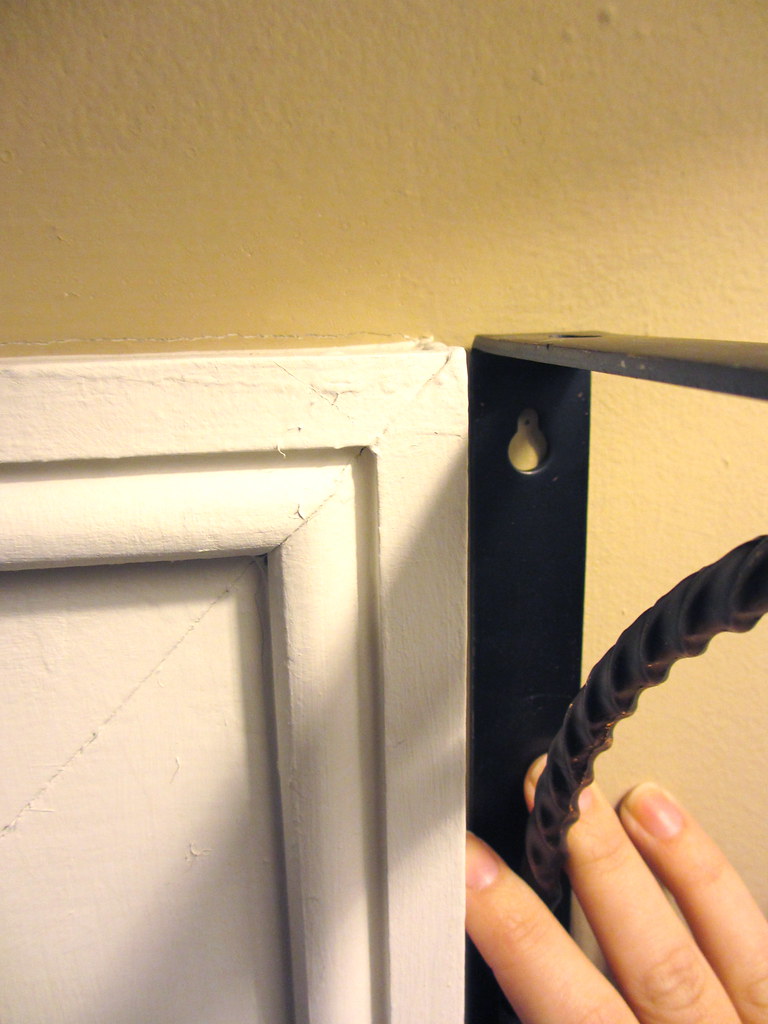
5) Install your brackets, ensuring they're level and that you're drilling into studs. While this isn't super important for small pictures, screwing into a stud is essential for any heavy/load-bearing wall items like shelves.

6) Place your board on top of the brackets and attach using small screws. These are really just to keep the shelf from sliding off the brackets, so don't need to be super duper heavy duty.

7) Place art and DIYed match bottles (look, I made another one!) and a giant calendar on your new shelf. It's obviously a bit bare right now, but hey, art will definitely be DIYed in the near future!


To make matters worse, it's not only an awkward length that apparently no pre-made shelfs would fit, but there also weren't any studs in the wall to hang it from anyways. So, I just had to make one.
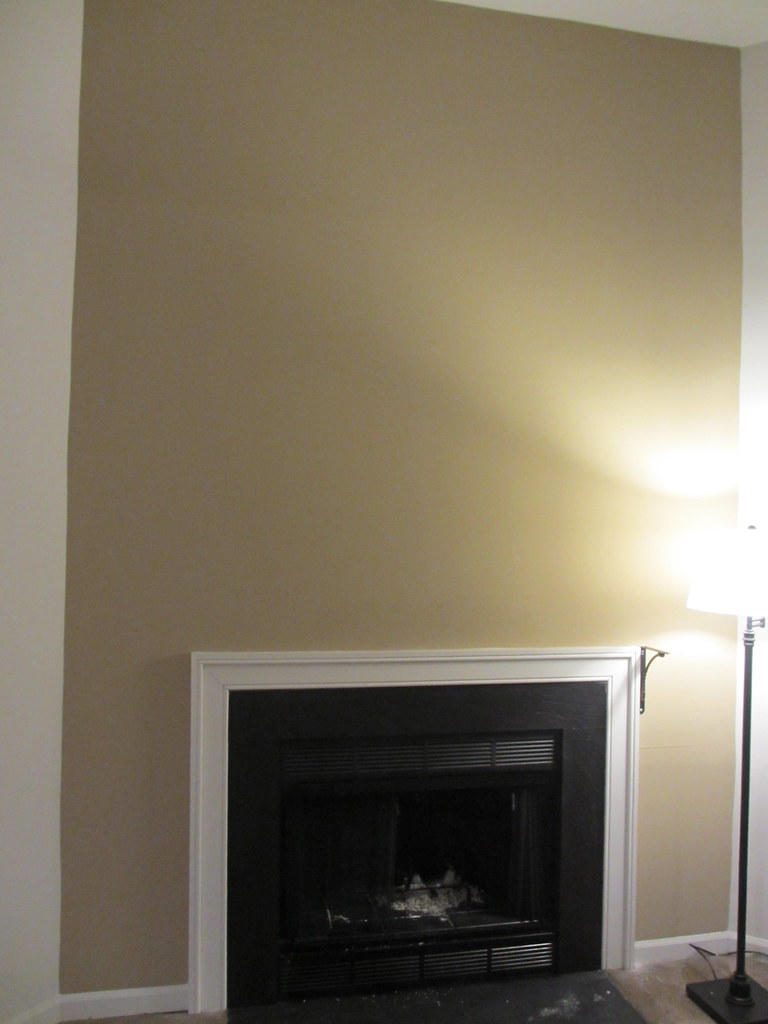
Super tall ceilings + no shelf + no art = boooooring!

SO much better!
Wood board
Shelf brackets
Screws
Studfinder (if no studs, get screws specifically for drywall installation)
Sandpaper
Stain and/or varnish
What you do:
1) Measure your fireplace width, then add a few inches on either side. I only added 5, so that it would end right over the brackets on either end, and not extend beyond the edges.
2) Determine how deep you want your shelf to be. Keep in mind that if your fireplace is relatively small like mine, you don't want a huge shelf to totally overwhelm it.
3) Pick out the type of wood you want, and get it cut down to size (yay Home Depot!). I chose Aspen since I liked how light it was and I knew I wouldn't be applying a stain.
4) Since most freshly cut pieces of wood look something like this...
...lightly sand your new shelf. Stain and varnish if desired (I didn't since it's so darn cold outside and you DO NOT want to have all those fumes inside).
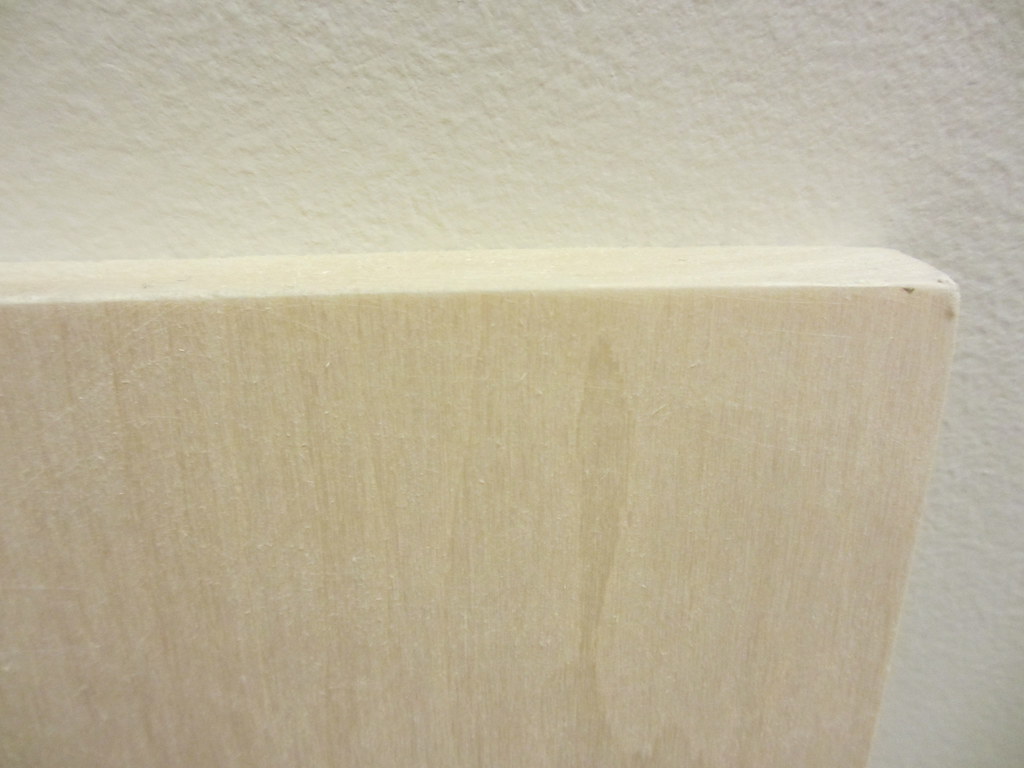
Oops, kind of over-sanded that corner... but at least no splinters!
6) Place your board on top of the brackets and attach using small screws. These are really just to keep the shelf from sliding off the brackets, so don't need to be super duper heavy duty.

Pro-tip: don't completely tighten each screw one at a time. Partially screw them all in, then go around and tighten them all gradually.
7) Place art and DIYed match bottles (look, I made another one!) and a giant calendar on your new shelf. It's obviously a bit bare right now, but hey, art will definitely be DIYed in the near future!


Wednesday, February 13, 2013
DIY: Valentine's Dreamcatcher
I've always felt a weird aversion to theme-y DIYs. They always look so cute in pictures, but so horribly cheesy in my living room. So I tend to avoid them like the plague.
Buuuuut with all of these sparkly things leftover from projects past, I couldn't help myself. Especially since it would make for such a horrible pun about catching the man of my dreams for Valentine's... But I'll try to restrain myself....

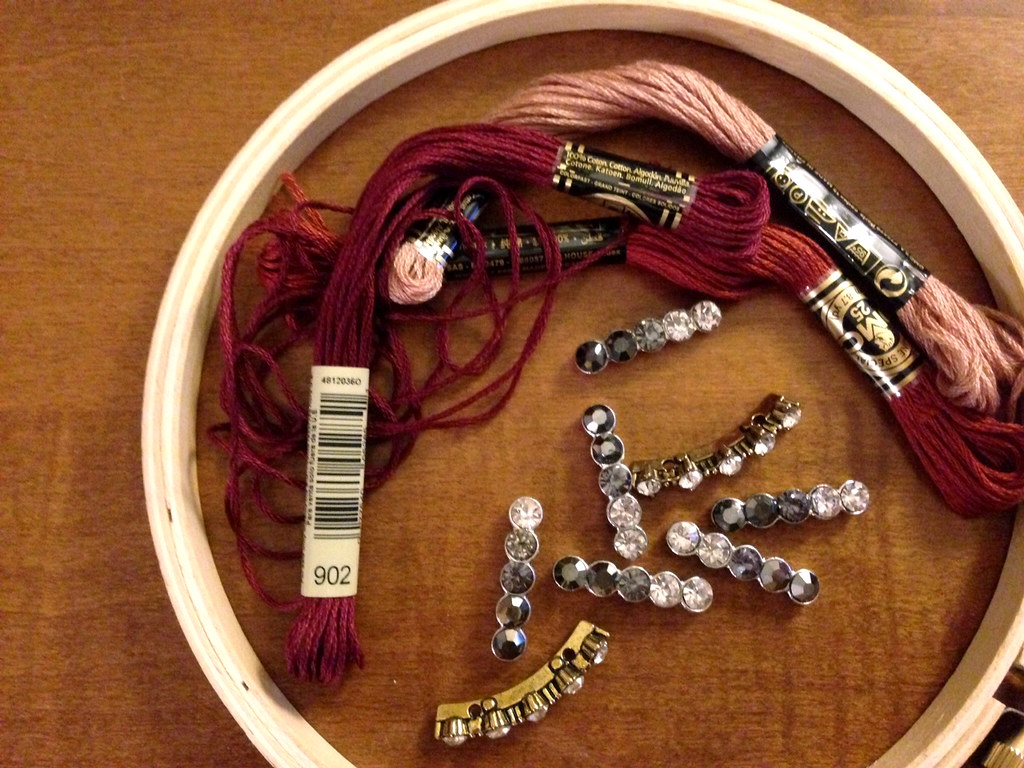
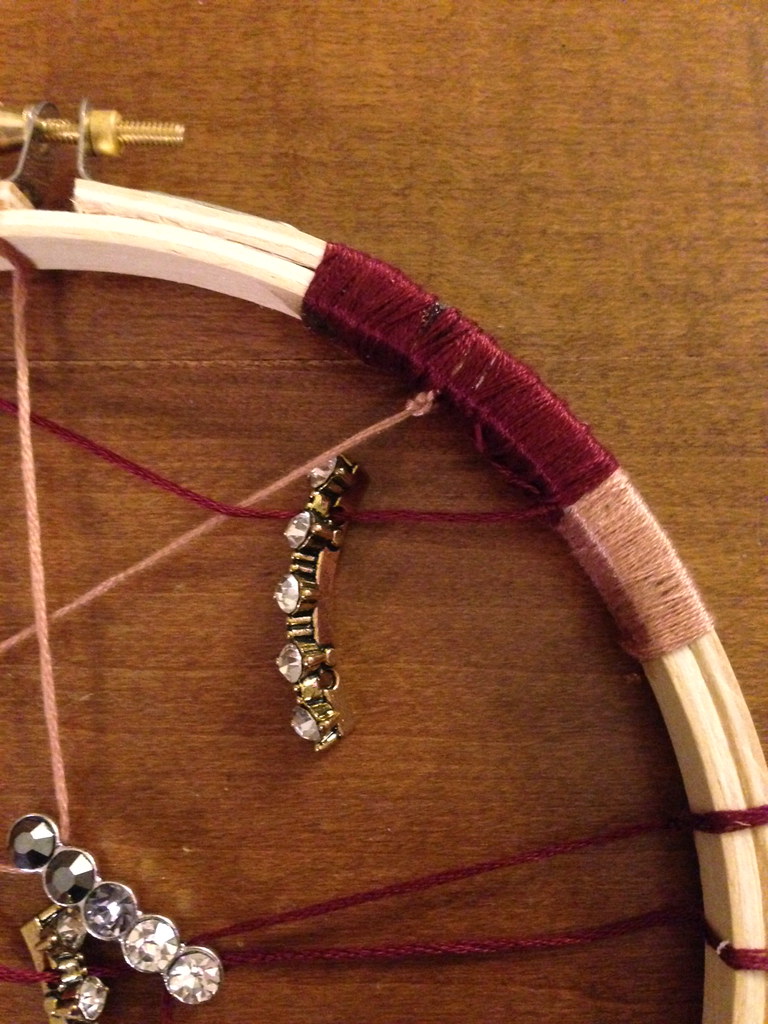
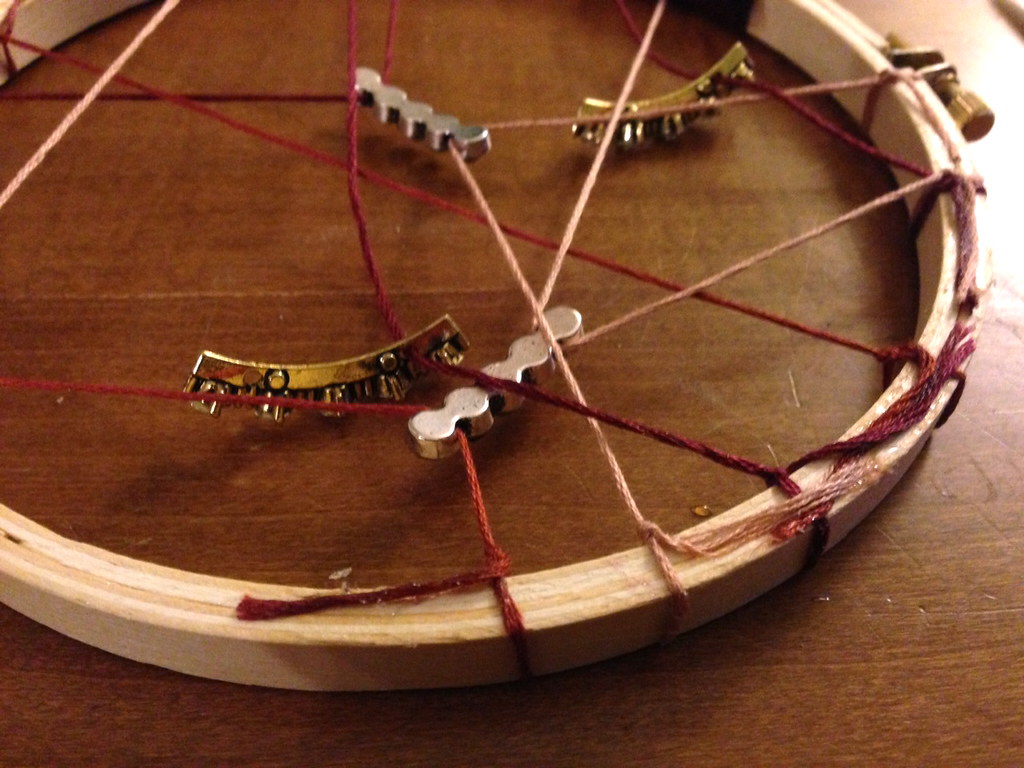
What you need:
Embroidery thread or yarn
Rhinestones and beads
Embroidery hoop
Glue
Scissors

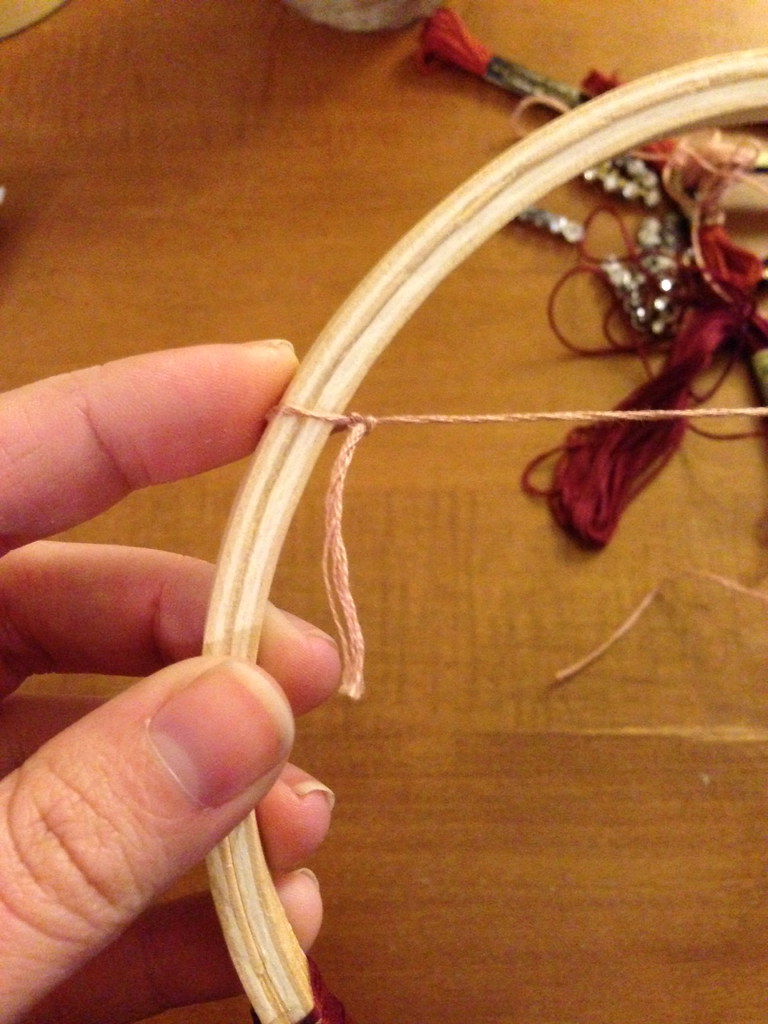
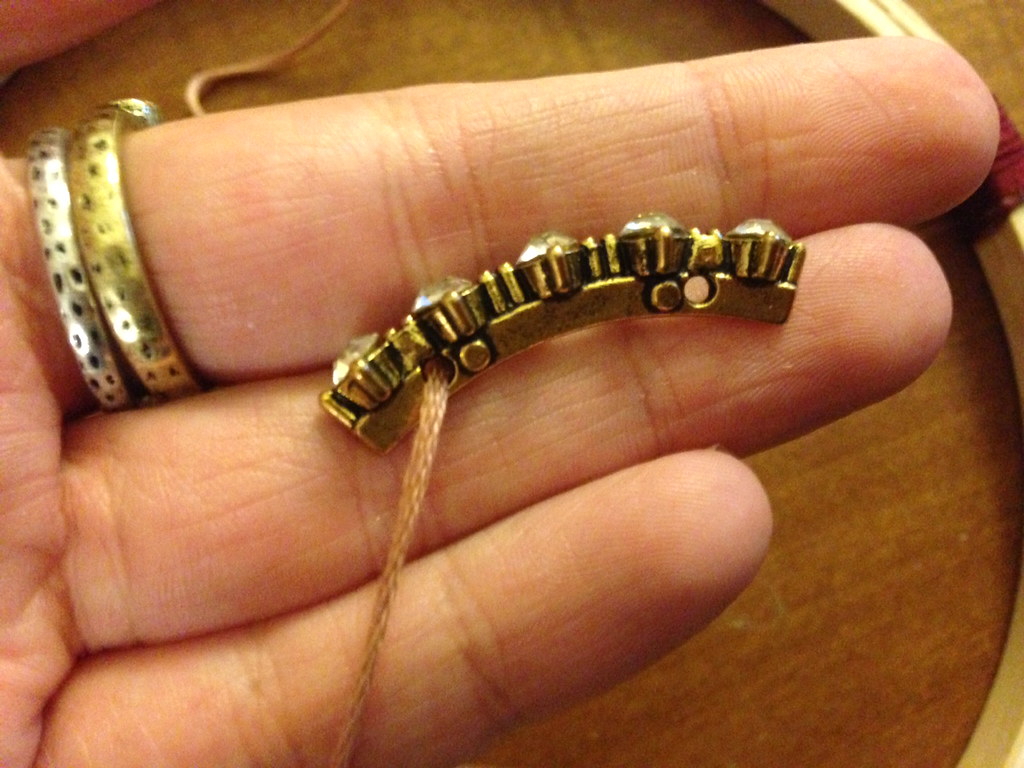
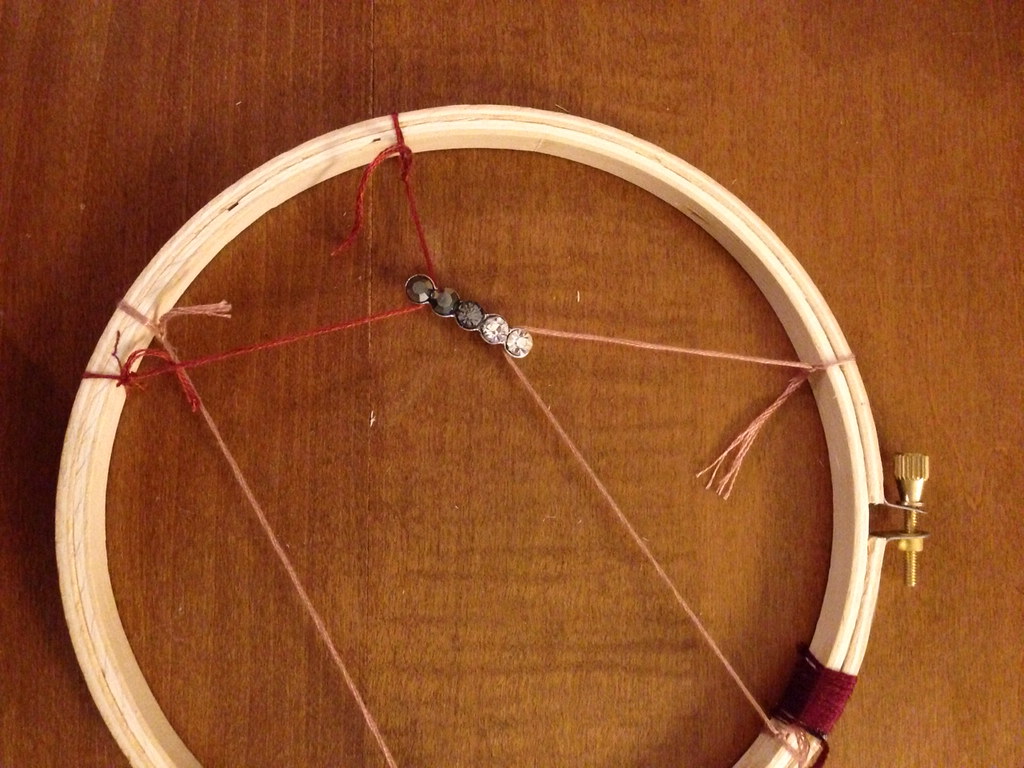
What you do:
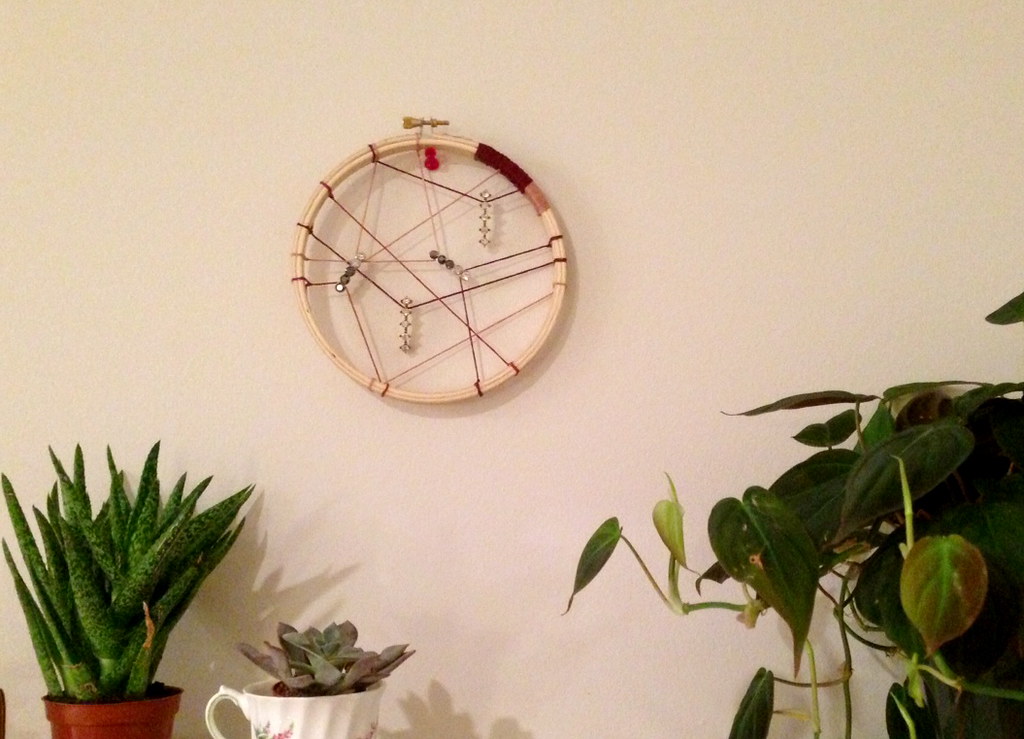
1) Tie thread around the edges of the embroidery hoop at random.

2) String some beads or rhinestones along some of the threads. I had rhinestones that had two holes, so I used two threads to suspend a couple, and then let a couple hang down. You could also tie knots on either side of the bead to keep them in place.


3) Wrap some thread around the embroidery hoop if desired.

4) Glue all the loose ends to the back of the hoop.

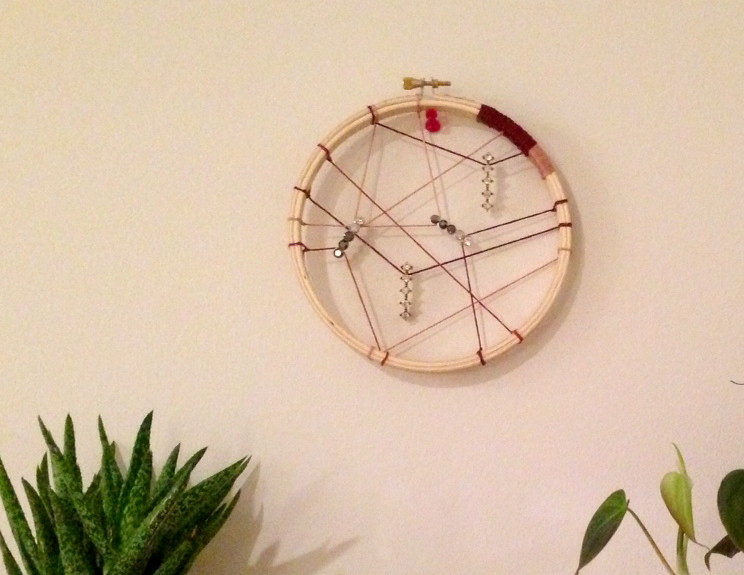
5) Hang up! Hint: Oh look, a preview of an upcoming apartment decor post :)


Buuuuut with all of these sparkly things leftover from projects past, I couldn't help myself. Especially since it would make for such a horrible pun about catching the man of my dreams for Valentine's... But I'll try to restrain myself....
What you need:
Embroidery thread or yarn
Rhinestones and beads
Embroidery hoop
Glue
Scissors
What you do:
1) Tie thread around the edges of the embroidery hoop at random.
2) String some beads or rhinestones along some of the threads. I had rhinestones that had two holes, so I used two threads to suspend a couple, and then let a couple hang down. You could also tie knots on either side of the bead to keep them in place.

3) Wrap some thread around the embroidery hoop if desired.
4) Glue all the loose ends to the back of the hoop.
5) Hang up! Hint: Oh look, a preview of an upcoming apartment decor post :)

Wednesday, February 6, 2013
DIY Home Inspiration: Wall Decals
My apartment has 20 foot ceilings in the living room, so I've been looking for a giant piece of art to put above my mantle to fill all that space. Unfortunately, art pieces that big are slightly outside my budget. Okay, so what about wall decals?
I've always thought wall decals were a little tacky. Most are flowers, butterflies, or "inspirational quotes" with the words "live, laugh, love" somehow incorporated. Booooooring.
And then came Blik. I'm going to thrift a giant cheap frame, take everything out of it, hang the frame above my mantle, slap one of these (surprisingly affordable) beauties inside it, and I've got myself a statement piece of art.


Or how about using these bad boys as a headboard or mirror frame? So. In. Love.


For all the old school video game geeks out there (woohoo!) they also have huuuuge Super Mario Bros, Pacman, Asteroids, and Space Invader wall decals. Still don't see anything you'd like? That's alright, cause you can just DESIGN YOUR OWN.
I've always thought wall decals were a little tacky. Most are flowers, butterflies, or "inspirational quotes" with the words "live, laugh, love" somehow incorporated. Booooooring.
And then came Blik. I'm going to thrift a giant cheap frame, take everything out of it, hang the frame above my mantle, slap one of these (surprisingly affordable) beauties inside it, and I've got myself a statement piece of art.


For all the old school video game geeks out there (woohoo!) they also have huuuuge Super Mario Bros, Pacman, Asteroids, and Space Invader wall decals. Still don't see anything you'd like? That's alright, cause you can just DESIGN YOUR OWN.
Friday, January 25, 2013
A Little Bit Of Friday Happiness
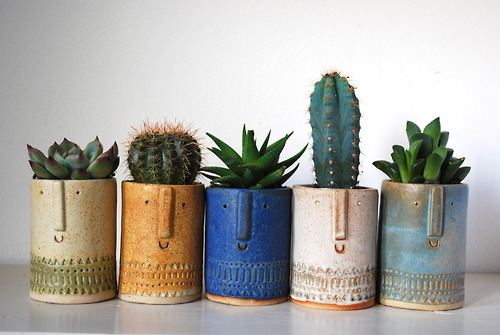
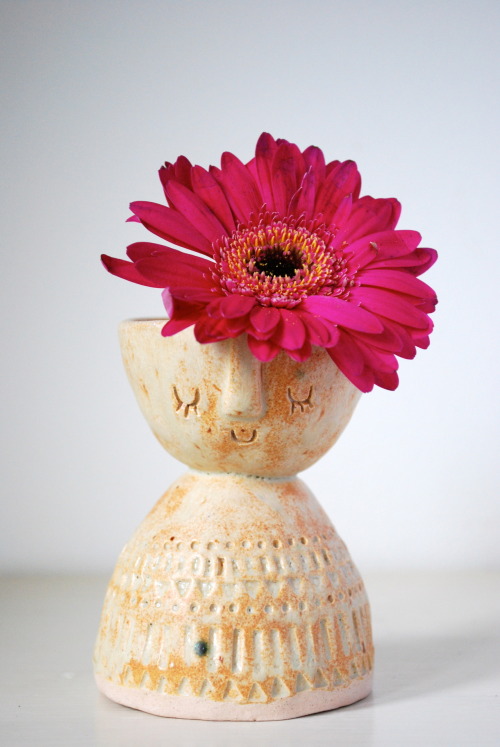
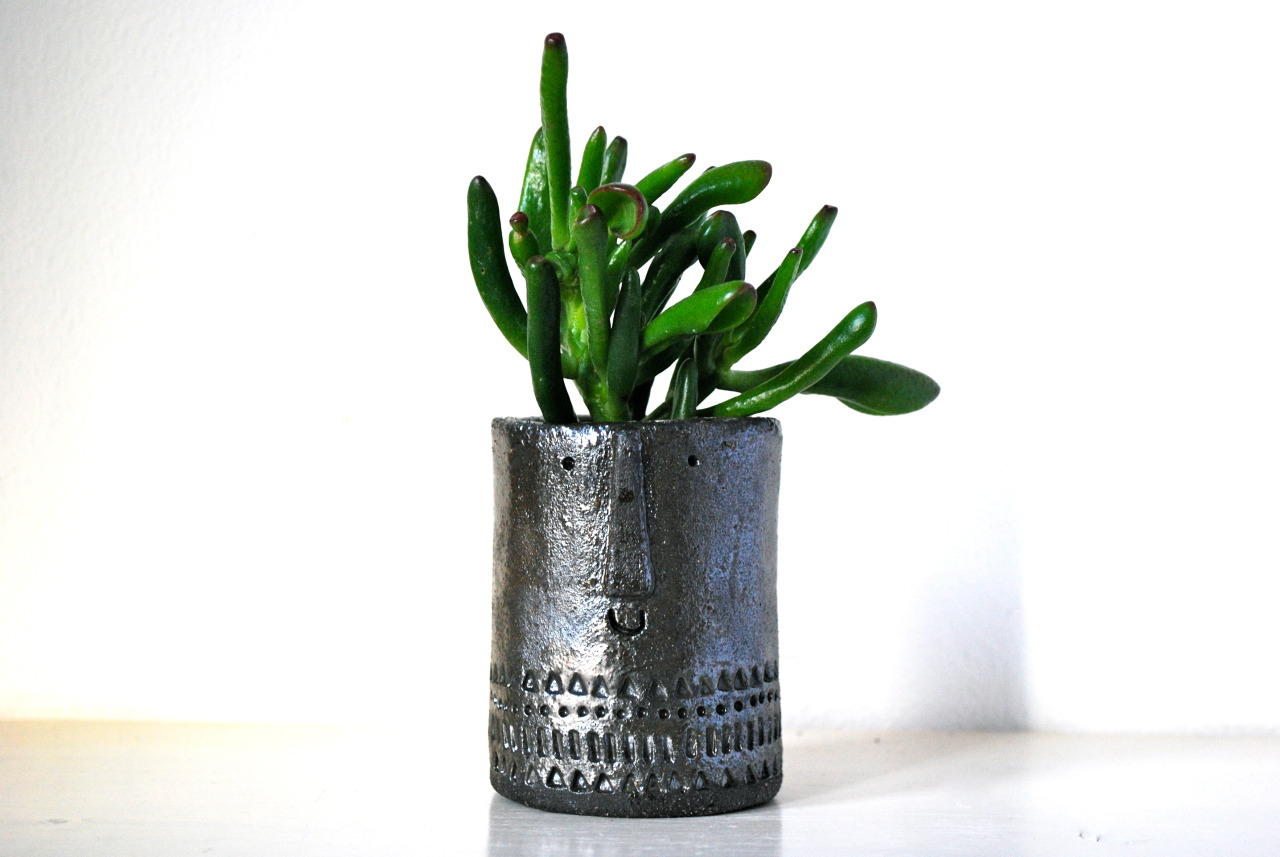
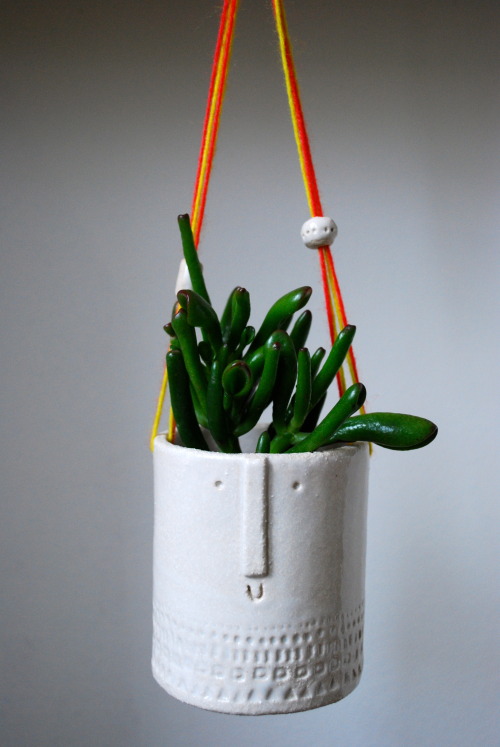
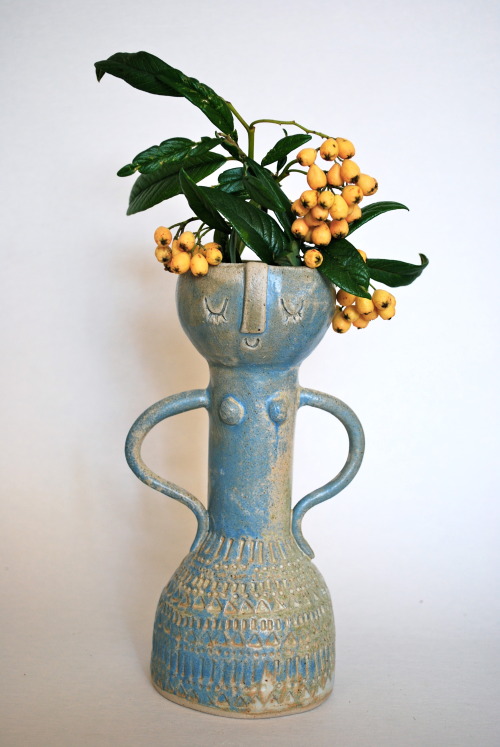
These little pots make me smile, nay, grin like a big idiot. Because they are just that stinkin adorable. I'm off to go purchase like 30 of them so I can have a mini garden of happy little plants in even happier little pots. (Except the shop technically only has 3 on sale right now...)


Gah it's like they all just have really fabulous hair and they know iiiiit!! Or they're really super shy about their new haircuts or just got asked by a cute girl to prom or I really need sleep.
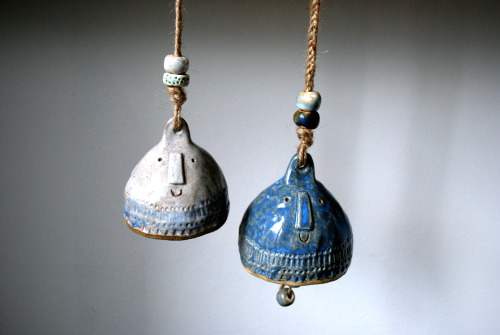
Anyways, If there's any left over, get yours here! Yeah Etsy! And just because they're equally adorable, here's some matching clay bells.


Anyways, If there's any left over, get yours here! Yeah Etsy! And just because they're equally adorable, here's some matching clay bells.

Subscribe to:
Posts (Atom)