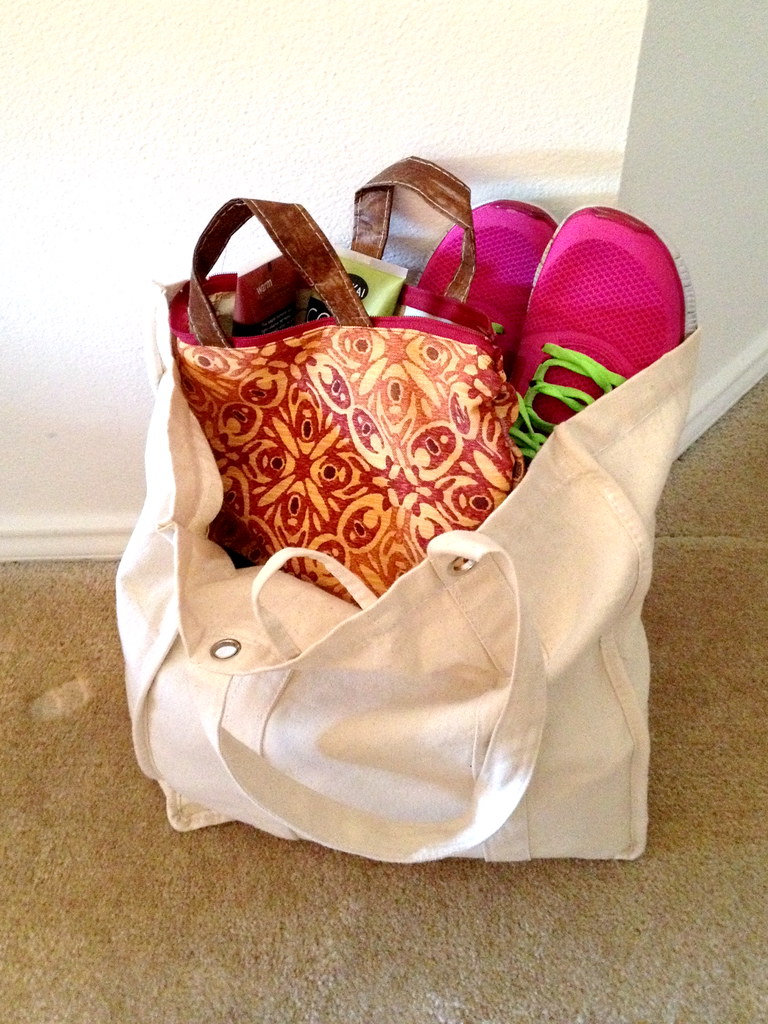
The biggest pain for me about going to the gym is all of the baggage I have to carry around with me (day clothes, work clothes, make up, hair dryer, lotions, etc), plus the damp toiletries I have to tote around in an unsightly plastic grocery store bag. This usually equates to me staggering out of the house in the morning with two or three psuedo-gym bags, plus my normal purse. Not. Fun.
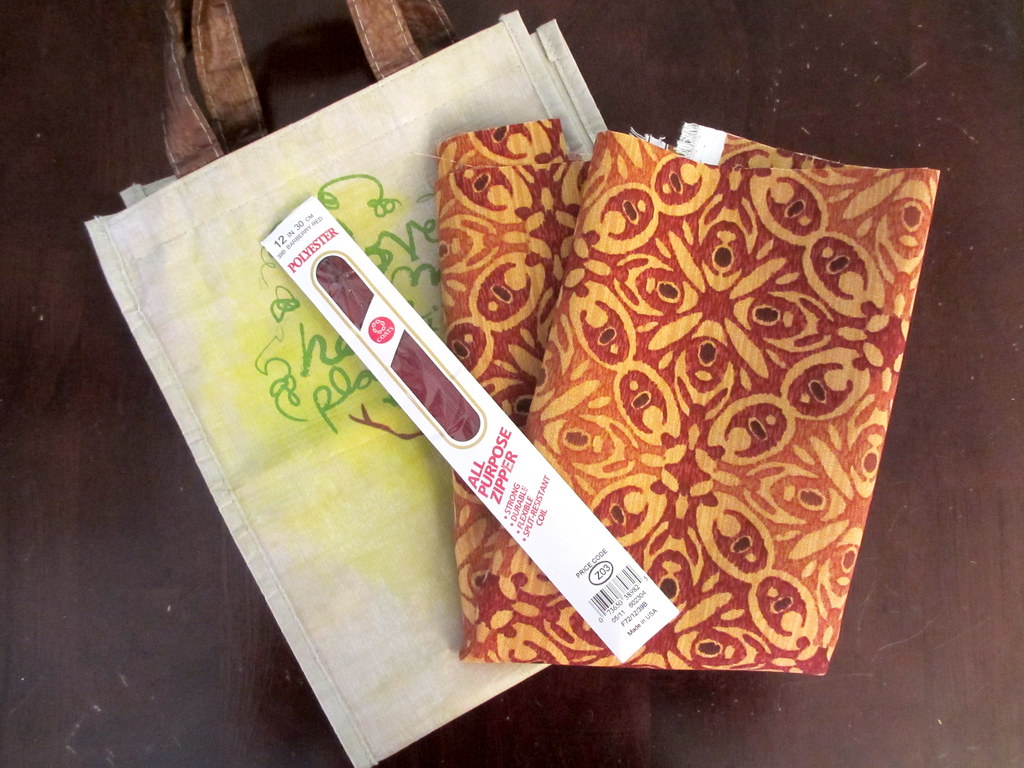
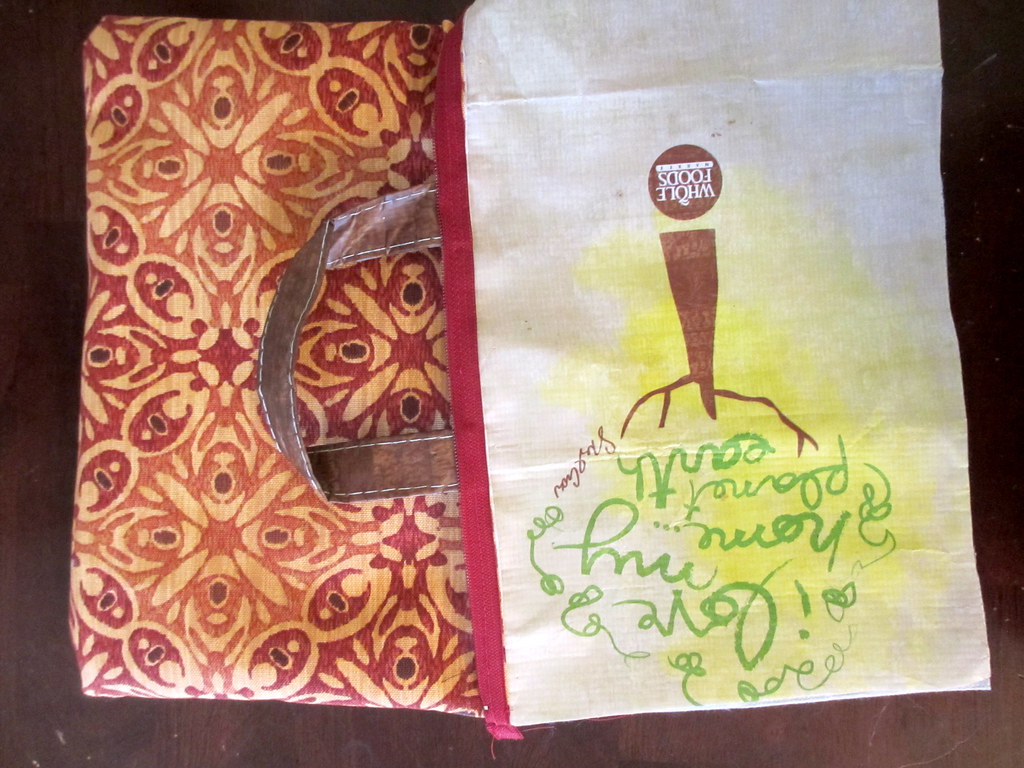
The first step into solving this was getting a proper toiletries bag. Enter a ridiculously tiny Whole Foods reusable (and notably, waterproof) bag that I never ever use due to its size. Are you thinking what I'm thinking? DIY project made (mostly) with stuff you have lying around the house anyways, yay!
NOTE: you can totally use this method to create a cute lined clutch! Just pick different fabrics, remove or change the handles, and voila!
What you need:
A plastic/waterproof reusable grocery bag
Some outdoor fabric - it repels water and resists mildew etc!
A zipper (I used a 12" one)
Scissors
Sewing Machine
What you do:
1) Cut two rectangles of fabric that are slightly wider than the zip part of the zipper, and however long is convenient to fit your shampoo bottles in.

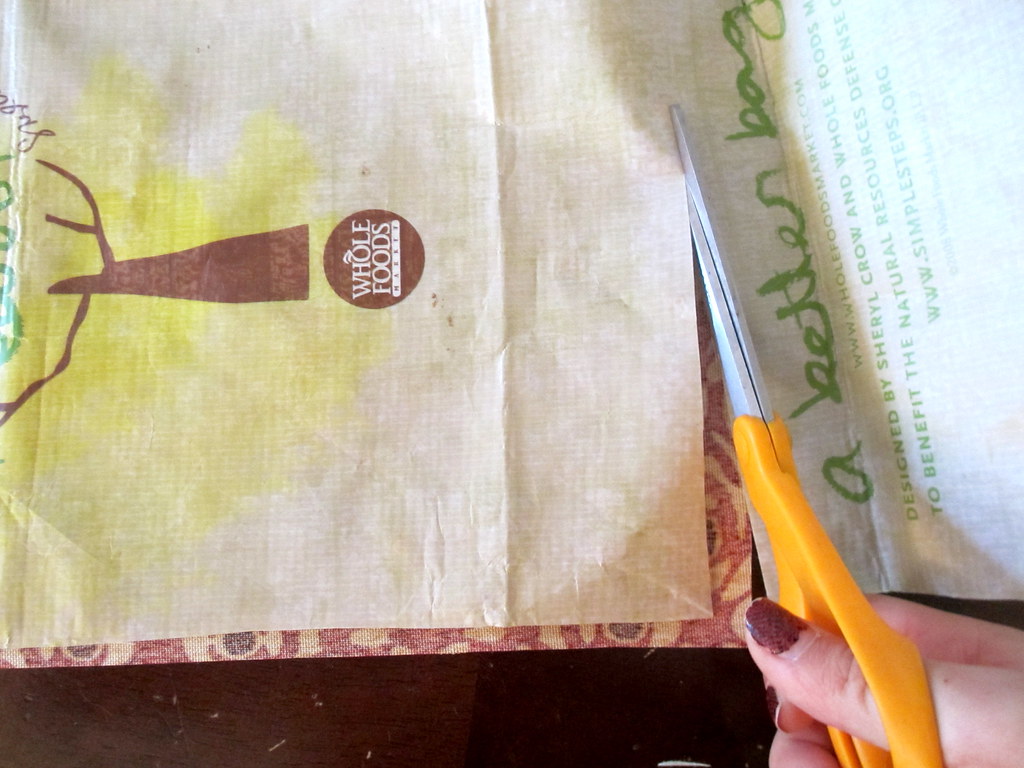
2) Cut two rectangles from your plastic reusable bag that are slightly smaller than the ones you cut from your fabric. Cut off the handles of the bag and save.
The outside of my bag was a plastic waterproof material, so I'll be calling that side the "right" side.
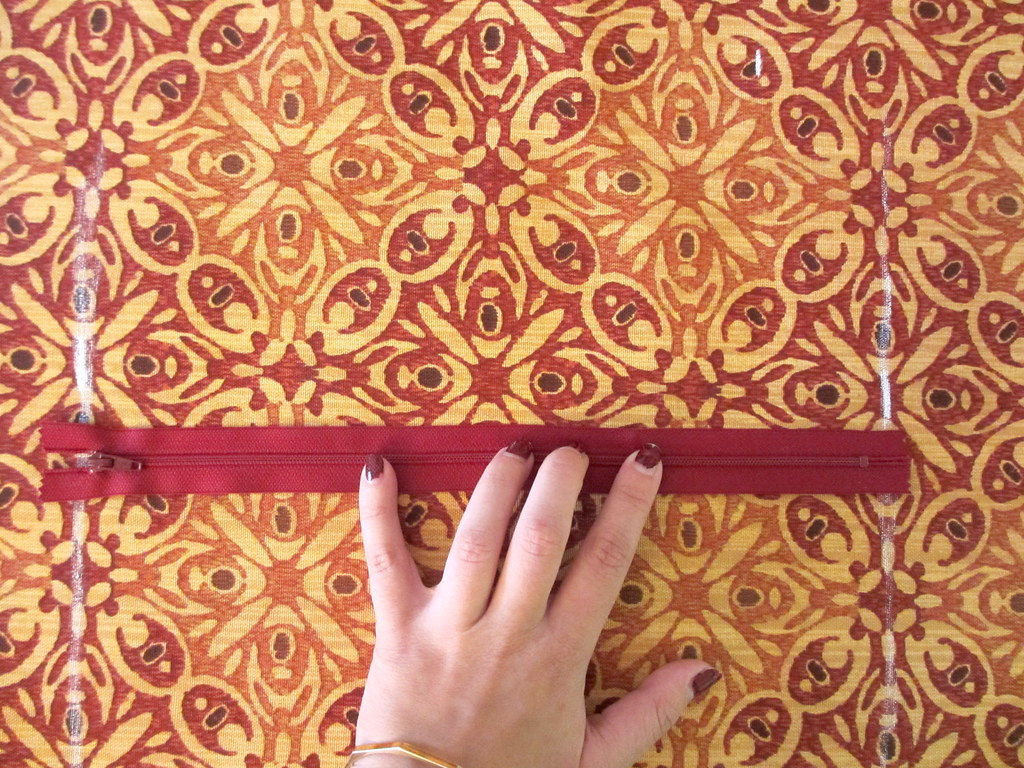
3) Line up and pin down your zipper (right side DOWN) on top of one handle, one of the fabric rectangles (right side UP), and one plastic bag rectangle (right side DOWN). Sew down, and topstitch if desired.

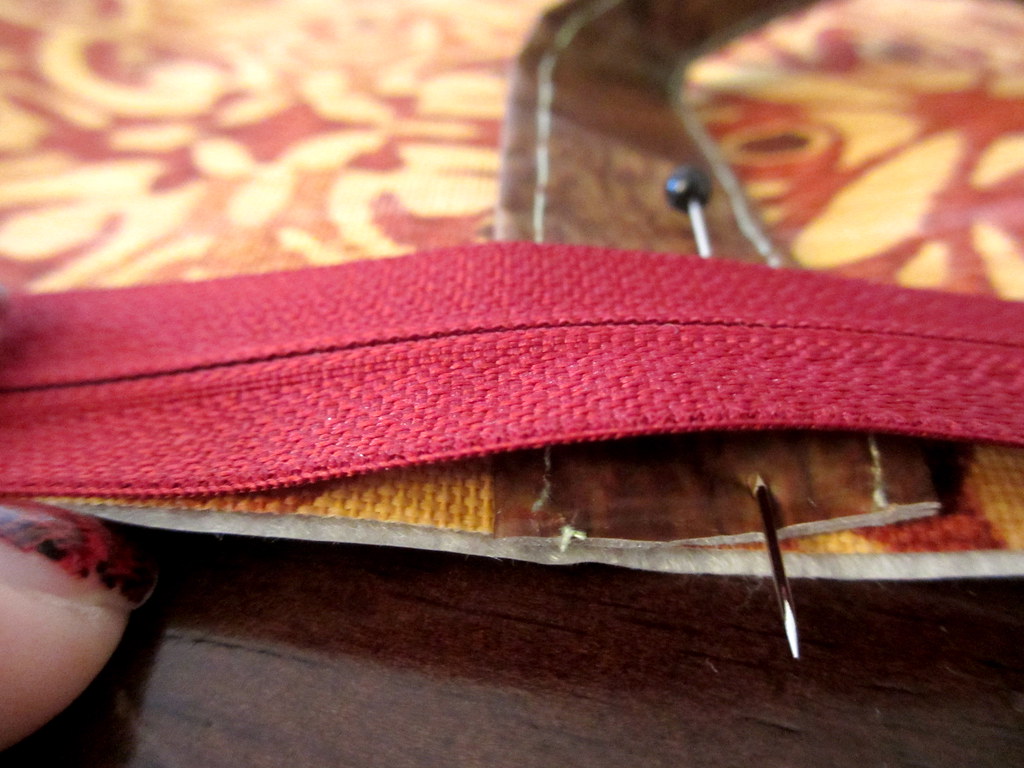
Make sure the edges are in line like this - the top photo is just for order reference!
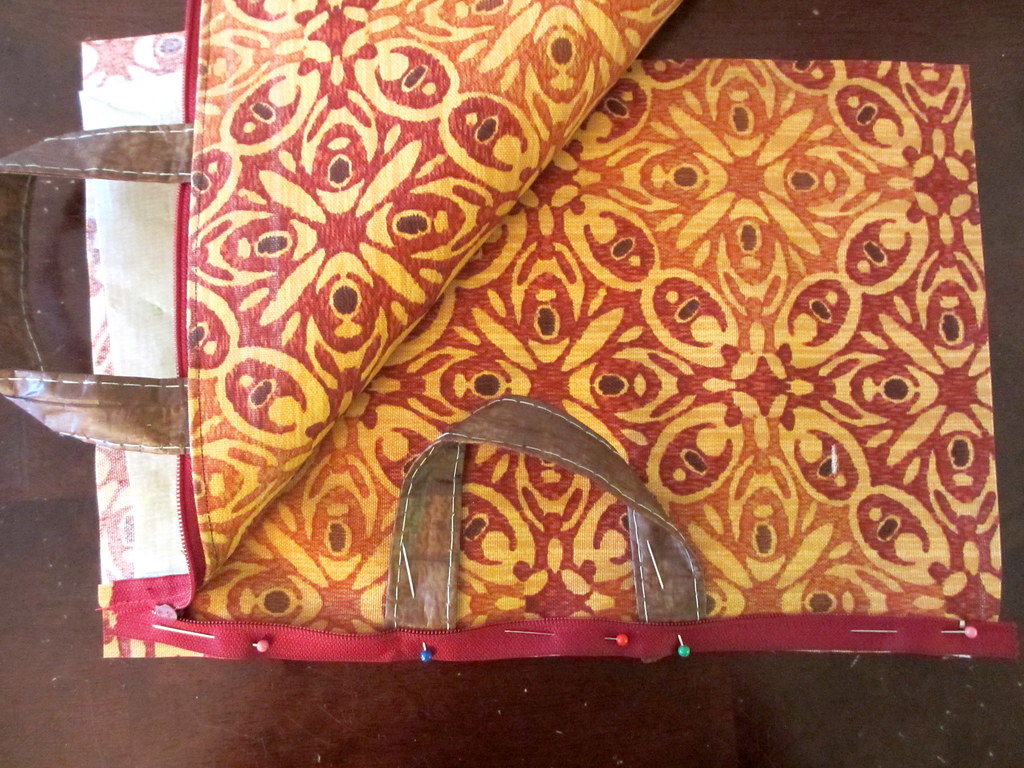
5) Move both sides of the liner out of the way, and sew all the way around the edges of the outer fabric.
6) Turn the bag inside out so the liner sticks out, then sew all the way around the edges of the liner.

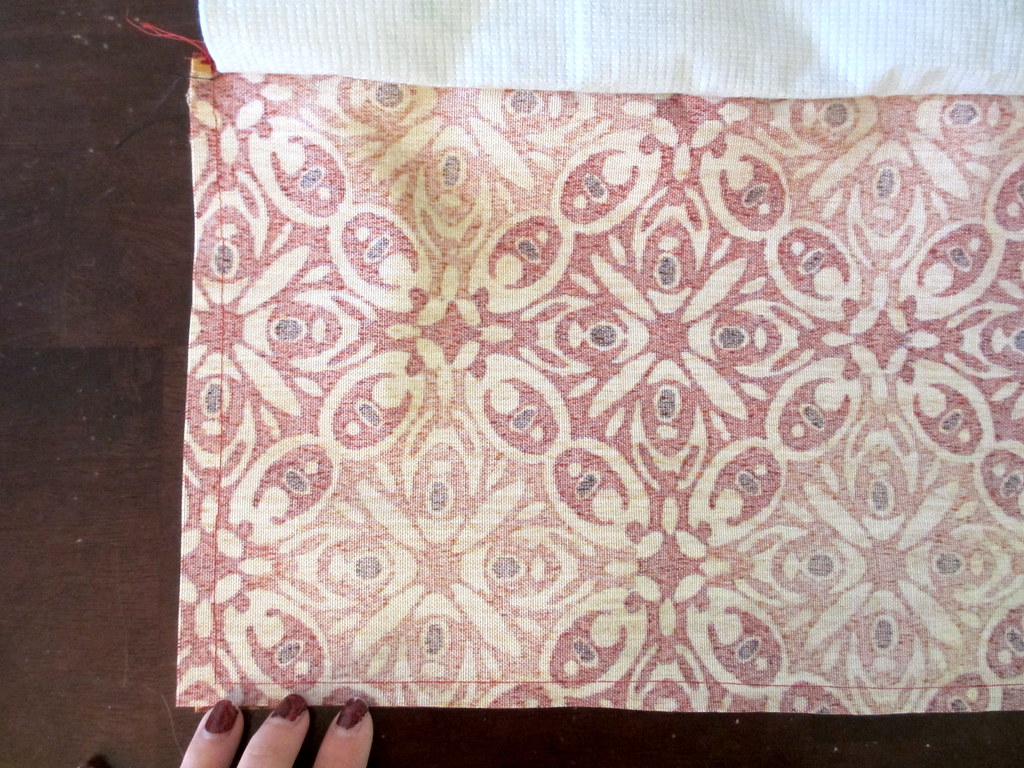
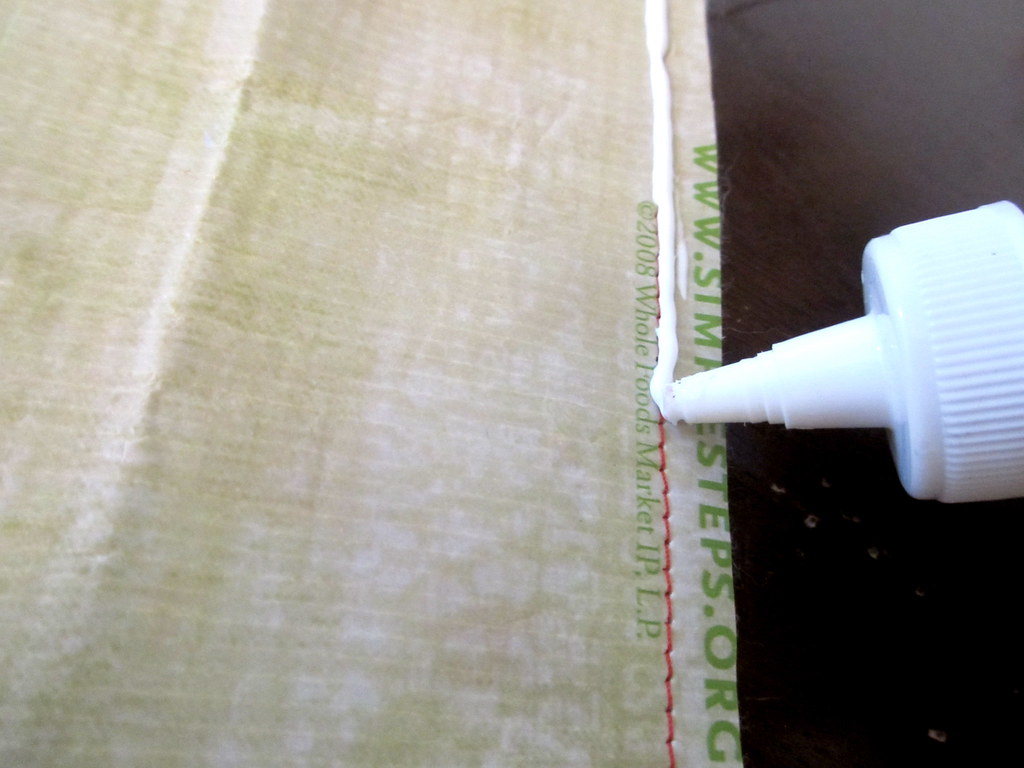
7) To make the bag more water-resistant, I added a couple layers of glue over the stitches in the lining, but this is optional.
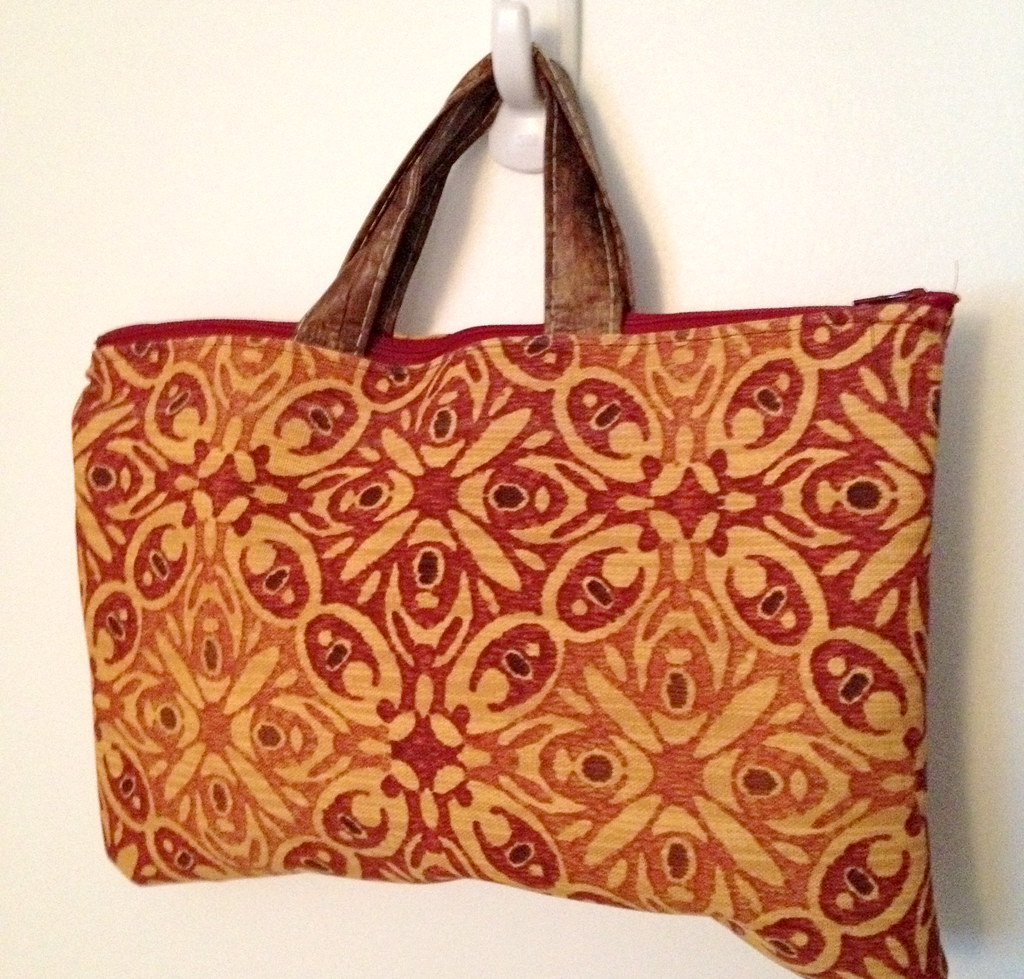
8) Push the liner inside the bag, situate everything so its nice and flat, and tote that sucker to the gym!
No comments:
Post a Comment